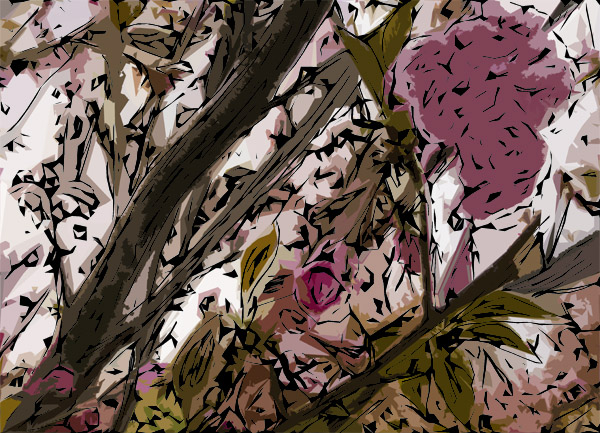
Catie Peterson's Tracing Technique
Catie used a hand-drawn tracing of her original photo to achieve the appearance shown here. Because a hand-drawn tracing naturally follows the contours of perceived objects, it's better than a "push-button" filter applied overall to a photo. Humans recognize objects in the photos, and follow their shapes instinctively. Filters don't.
The filtered color photo positioned beneath the black line art provides the color in the illustration. A tracing of the original photo - with filters applied - provides the bold, black line-art overlay.
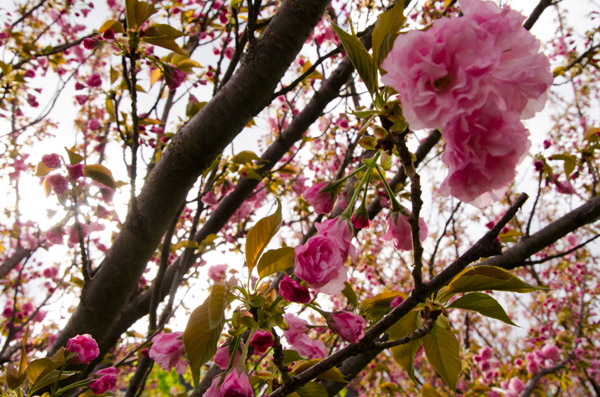
Here is the original photo before work was done to it.
Catie began by printing a copy of this photo to a b/w laser printer. The paper printout was taped to a bright window so that she could see through the paper to trace on the back of it. A light table, if available, is an even better option.
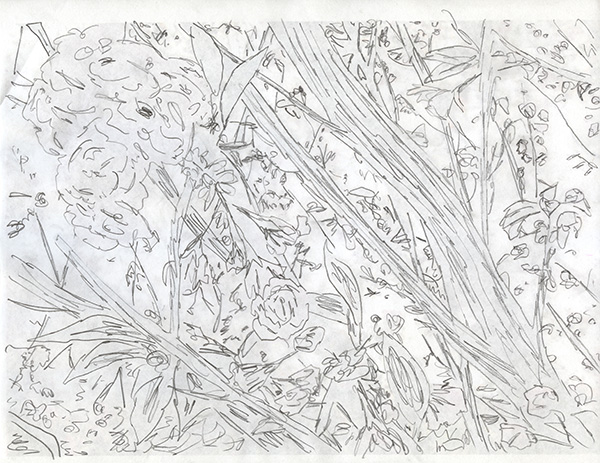
The tracing is digitized using a flatbed scanner. It will be flipped horizontal (Image>Image Rotation>Flip Canvas Horizontal) to orient it correctly before further work is done.
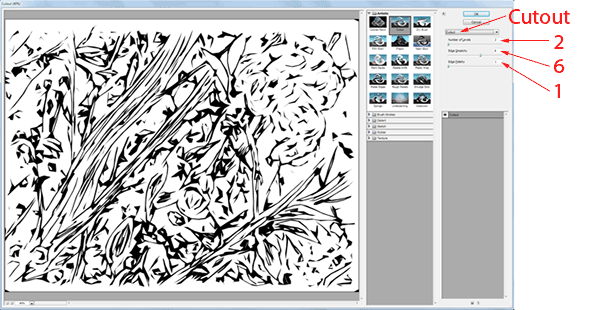
The digitized tracing is then converted to Grayscale mode (Image>Mode>Grayscale) if it is not already, then Threshold is run on the tracing to darken the pencil lines. (Image>Adjustments>Threshold). The amount of Threshold was 215 for this particular file.
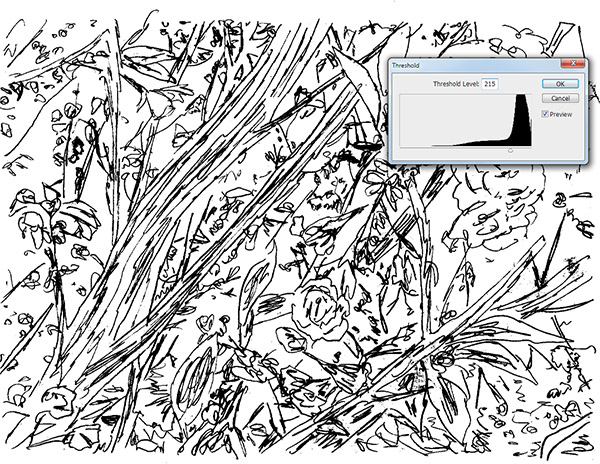
Next, the grayscale picture (and it MUST be grayscale to work as described) is subjected to a Cutout filter in the Filter Gallery. (Filter>Filter Gallery, choose Cutout).
These settings were used in the numeric controls:
Hit OK to apply this filter. Save this file now, just in case.
It's now time to treat the original photo to a similar filter. Open the original photo.
Adjust colors to suite, and employ the Filter Gallery Cutout filter. Catie used different settings for this particular version of her image...
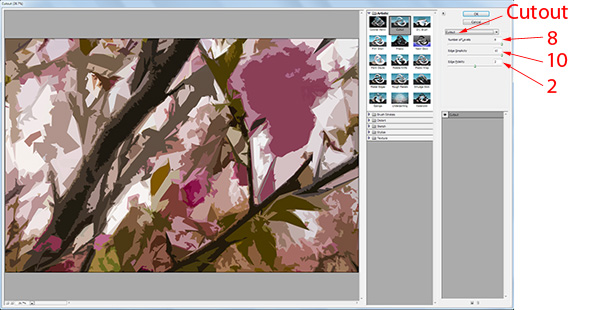
The settings as shown in the illustration above are:
Note that these are different from the settings applied to the grayscale tracing.
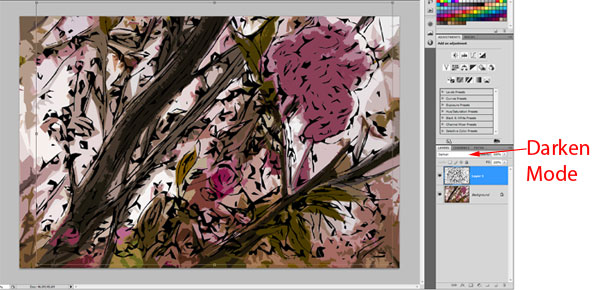
Once the two versions of this picture are filtered, copy the filtered tracing image, and paste it over the filtered photo image. Once it is pasted on top, change the layer mode to Darken. Darken mode in the Layers Palette drop-down list will hide the white background of the filtered tracing.
Then use Edit>Transform>Scale to match sizes. It would be best if the tracing picture layer were not upsized very much, or it could get pixilated edges. That requires a high-resolution scan of the original tracing.
Bill Schneider
December 3, 2013