1. Open your original Camera RAW file (NEF, CR2, ORF, etc.) by double clicking its icon in Bridge. You will get a dialog box that looks like this:
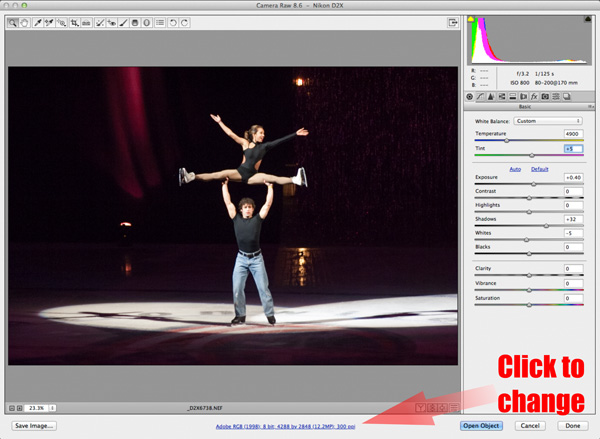
The blue text at the bottom (workflow options) should show Adobe RGB (1998); 8-bit; your camera's default picture size in pixels; 300 ppi.
If it doesn't, click the blue text to get the dialog shown below, and set things as show below. The Image Sizing area will be specific to your camera, but Default is what you should choose regardless of the MP (Megapixels) showing.
Tone, spot, and crop your picture as required in Camera RAW. All these changes are reversible and forever changeable if you do them in Camera RAW.
2. Click the open button at the bottom to bring the picture into Photoshop with the corrections applied. To be safe, save the new file right away. You will NOT be able to save over the original Camera RAW file (and that's a good thing!), so you should save it as a TIF, JPG, or PSD file. JPG files consume much less hard drive space, but the tradeoff is that the file is slightly changed. Done with enough Quality in the dialog box (7 or higher), the slight changes will be mostly invisible.
3. Once the file is saved, and open in Photoshop, it's necessary to make the pixels fit the printing paper size. Most students print to an 8.5x11 inch sheet of paper. Unfortunately, we can't print to the cut edges of the paper, and must leave a non-printing margin. That means that the print size must be somewhat smaller than the paper size.
To do this, open the Image>Image size dialog box. (The following is a screen capture from Photoshop Creative Cloud. If you are using CS6, the dialog will differ, but use the same settings.)
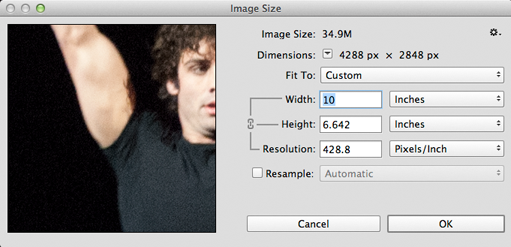
In this dialog, UNCHECK Resample, and enter 10 inches for the longest dimension in your picture. That will be width for landscape pictures, and height for portrait. This allows a 1/2" margin at either end for the long dimension. Check to be sure that the other dimension isn't over 7.5 inches - usually not a problem unless you've cropped the picture nearly square. Note that the resolution is changing when you change print dimensions. If it doesn't go below 200 pixels/inch, you are fine. Click OK to accept the changes.
4. One final check on the color space profile can be done now. Photoshop can be set up (unwisely) to automatically change color spaces when a file opens without you knowing it. To ensure that you have the AdobeRGB color space for printing in our labs, open the Edit>Convert to Profile settings dialog...
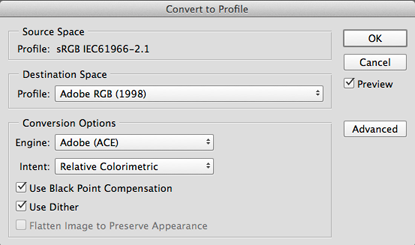
The dialog displays the current color space ("Source Space") and the Destination Space. There are two possibilities...
a. If "AdobeRGB (1998)" displays in the Source Space, just click Cancel. You are already in AdobeRGB.
b. If the current Source Space is something else, then choose AdobeRGB (1998) in the Destination Space, and click OK to convert the file.