Easy Astrophotography
With inexpensive digital cameras in widespread use today, doing casual astrophotography has became much easier. Even a low-cost amateur digicam can be used to take remarkable pictures of the brighter objects in the heavens - the moon, planets, and the sun. Faint fuzzy objects like nebulae still require expensive mechanisms like tracking mounts.
My first attempts are astrophotography were very simple - I merely held the camera up to the eyepiece, saw the planet Saturn in the display on the back, and pressed the shutter. Holding the camera still enough for a 1/60 second exposure was the biggest challenge, but I was able to do it well enough to get a recognizable picture of Saturn.
Cell Phone Cameras
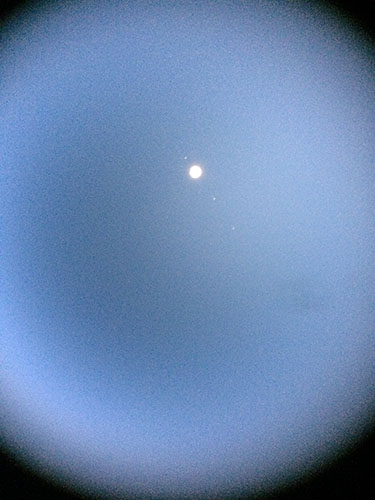
This picture of Jupiter and three of it's moons was made by holding my iPhone 5S
up to a 9mm Nagler eyepiece in my 8" f/6 Dobsonian. Without any manual override
of exposure available, the phone's camera overexposed the planet itself, but
considering heroic efforts required in the film days, it's remarkable.
Through a regular camera, an object like the moon may show up adequately even without using a telescope, but it will be small in the frame. You might try using a pair of binoculars steadied on a tripod (if not a proper binocular mount, try using duct tape - why not?) and make a picture through the eyepiece to get a larger image than you can achieve with just the camera. Experiment with different exposures to retain detail on the moon. Usually auto exposure tends to make the moon a bald white spot. Less exposure is really needed.
Looking for a Camera?
Since those early frames showing Saturn, my next step was using a camera that had
features more suitable for astrophotography -- my Casio Exilim EX-P600
6-megapixel camera. It had a wireless remote shutter release, and the ability to screw
in an optional holder that allowed it to be attached directly to an eyepiece.
That provided a magnitude improvement in steadiness and sharpness over
handholding.
When shopping for a digicam to use with astrophotography, I also look for models that offer manual exposure controls and the ability to turn off any built-in flash. It is also handy to have a zooming picture review function to magnify the picture on the screen.
That old camera was a 6 megapixel model. Be careful of chasing megapixel numbers because that's not the whole story in regard to image quality, especially with dimmer objects. More megapixels may not improve the image much, and might actually contribute additional noise to the picture.
Ignore the "Digital Zoom" feature often touted in the camera literature. This is nothing more than a cropping function. Optical zoom is what matters. My camera has a modest 4x optical zoom range. Be wary of cameras that advertise a very large zoom range because there are usually optical compromises made to achieve that range. Sharpness may suffer.
Taking the Picture
Rule number one is to take MANY pictures and sort them all out later. There
will be a high percentage of bad pictures because of camera shake, unsteady
atmosphere at the moment the shutter was pressed, etc.
Rule number two is to turn off the flash! It won't do any good, and in fact will probably adversely affect the exposure. Remember also that the flash will shine on the outside of the telescope when the camera lens is nestled up to the eyepiece. So turn it off!
When taking pictures, it's important to hold the camera as still as possible at the moment of exposure. Some people are better at this than others. If you can buy or construct some sort of mount to hold the camera still at the eyepiece, that will benefit even the "steady Freddies". I usually set my camera for manual shutter exposures. I've found that bright planets can be photographed through my 8" f/5.6 Newtonian telescope using an exposure of 1/60 second to 1/125 second with the camera lens at f/4. This is not bad for handholding! When photographing the brighter moon, exposure times will be even faster.
Of course exposure depends on the light-gathering capability of the telescope, but a nice feature of digital cameras is that you can instantly evaluate your exposure and make adjustments. If a planet or the moon is "blown out" (pure bald white), reduce the camera exposure until detail is retained. If the target is murky, increase exposure.
For focus, let the auto focus feature of the camera to the dirty work. That part is easy!
I have purchased optional threaded camera holders for some of my digital cameras that screw into threads around their lenses like a lens filter does. On some of the cameras, I first have to remove decorative trim rings to expose the mounting threads. The Casio filter holder has threads on the outside of it that attach to a ring having 3 set screws. These set screws are positioned around the eyepiece and tightened to mount the camera firmly to the eyepiece. By doing so, I no longer have to worry about holding the camera steady. The telescope and camera are one unit. The threaded eyepiece ring is a TeleVue DEC-0049 49mm adapter ring that came with their digital camera to eyepiece adapter sets. (Note: It appears that TeleVue's adapter lineup has changed. The part number mentioned does not appear to exist anymore. ws 2010)
At high magnifications (125x or so), a planet will really zip through the eyepiece field - it will be gone from view in about 30 seconds. On hand-tracked telescopes, you will spend a lot of time re-finding the planet in the eyepiece. A tracking mount for the telescope would be best, but a good one will cost more than the camera. It's not necessary for casual astrophotography anyway.
Stacking Pictures
With multiple digital pictures, you can vastly improve the picture quality over
that of individual frames by "stacking" multiple similar pictures. Stacking
smoothes out noise and increases detail.
I begin by cropping in on the planet pictures to roughly center them in the frame. Each crop must be the same pixel dimensions. That means if your first crop is 500 pixels wide by 400 high, subsequent frames must use these same dimensions.
The program I use is Registax, a freeware program used by many astrophotographers. It will work with multiple still frames as well as a short video made through the eyepiece. Remember that video is made up of multiple stills shown in rapid succession.
You can see before and after examples of stacking in the mars shot on my astronomy front page.
Getting started with casual astrophotography is very easy. If you have your own telescope and a digital camera, you're all set. Otherwise find a place where amateur astronomers with telescopes will have a public event showing the moon or planets, and take your digital camera with you.