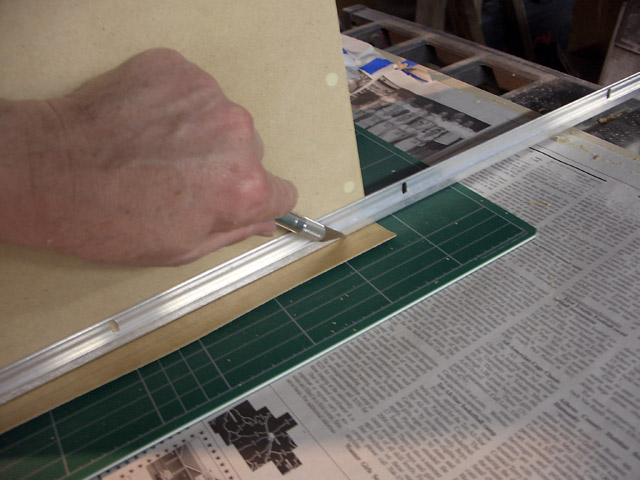
Rough cut: a piece of metal spaces the knife away from the box edge. Splintering wood WILL happen, so don't cut too close to the edge of the box.
Rough Trimming Veneer
I once used the steps below to remove the majority of overhanging veneer from the enclosure. I now use a router with a flush trim bit to do both the rough trimming and flush trimming in several small cutting passes. However, I've kept these notes here in case someone is interested in them.
Once the panel has cooled and you are satisfied that it has adhered sufficiently, it's time to trim it flush with the loudspeaker enclosure. I did it in three steps - a rough cut with a knife to leave about 1/8" material from the edge of the box, then a flush trim bit in a router, and finally some gentle sanding.
To make the rough cut, use a 1/8" piece of metal as an straight edge and spacer for the knife. It spaces the knife a small distance away from the enclosure. You'll find that the cut is ragged and the veneer surface splinters when cutting against the grain. The metal spacer keeps splintering at a distance from the box. You don't want to cut too close or the splintering and chips will become a "feature" of your loudspeaker! You'll also notice that it's much easier to cut with the grain. When cutting against the grain you get splintering and chipping.
When making these cuts, I went over the same cut line multiple times using light pressure. Eventually it cut through.
Rough cut: a piece of metal spaces the knife away from the box edge. Splintering wood WILL happen, so don't cut too close to the edge of the box.
This leaves a small amount to be trimmed with a router and a flush-trim bit. It may be possible to use the router alone to trim the entire excess veneer material (without the initial rough cut), but I felt nervous about a large flap of loose veneer next to a spinning router bit.