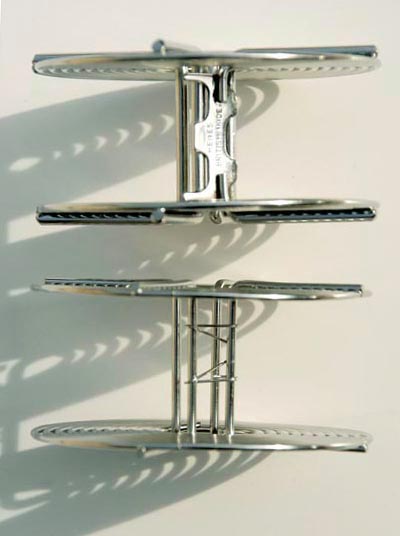
> Traditional Darkroom Class - Meeting 1

Meeting 1


Introduction and syllabus handout. Equipment requirements and needed supplies, estimated costs and where to buy. An overview of the types of assignments  will be presented in class.

A note about film developing reels:

Top - Hewes reel
Bottom - generic cheap reel

Recently some shoddily-made stainless reels have been purchased by students because of low cost. We've found that a disproportionate number of these that simply won't hold film because they aren't square or made properly. In addition, the thin steel wire used in them is bent easily with even a minor drop.

Malformed or bent reels won't load easily and may not hold adjacent film wraps apart, and you'll ruin film during processing. Ruined film costs money and time.

The best reels I've found (and the kind I use personally) are Hewes branded reels. They are sometimes sold under other brand-names (i.e. JOBO once sold Hewes reels under their name). The reels themselves are made of substantially thicker steel wire. The quality is very good.

They feature metal "fingers" in the center that catch the film's sprocket holes. The steel fingers make starting the film very easy to do compared to the fussy spring steel clips on the other reels.

While the Hewes reels cost more, they are worth it.

Choose a film to use. It's best to pick one and get to know it well instead of trying a different kind each week. Base film choices on intended shooting situations, i.e. ISO 400 type films for obtaining reasonable shutter speeds in areas of low light (indoors w/o flash, etc.) If you intend to do landscapes or photograph things that don't require fast shutter speeds,  use ISO 125 (or even slower)  films. A tripod will maximize picture quality and should be considered when possible, especially with low ISO films.

Big tip for better tones: Add one extra stop to all exposures on b/w negative film by setting the ISO dial to half the manufacturer's suggested ISO for the film. This will provide better tones in the print, especially when using the school's condenser enlargers.

Example: Tri-X is rated at 400 ISO by Kodak. Instead of using 400, set your ISO dial to 200 instead. Why? This provides a margin of error for underexposure and makes shadows look better. It also gives you some latitude in the darkroom to make contrast adjustments without "running out of negative" to get the look you want. Black and white film is VERY tolerant of overexposure but will behave badly when underexposed. When in doubt, give the film more exposure!