Printing to the Epson 890 printers under Mac OSX 10.3.9
Valid for Photoshop CS2 under Mac OSX 10.3.9. The steps shown can be adapted to newer versions of Photoshop using the same concepts.
When an Epson printer is connected and the Print Center is run, often two instances of the Epson printer are installed. Only one will work properly in the following steps. To choose the proper printer driver in the Print Center, follow this link.
After the correct driver is chosen, then you are ready to print from Photoshop. The following steps are for printing to an Epson 890 printer using Epson Premium Glossy Photo Paper. The settings below will not work for other papers, but I have a list of custom profiles available here for a handful of other papers. Substitute the appropriate settings from the linked page of profiles.
For printing from Photoshop CS to Epson 890 printers using Epson Premium Glossy Photo Paper, follow these steps:
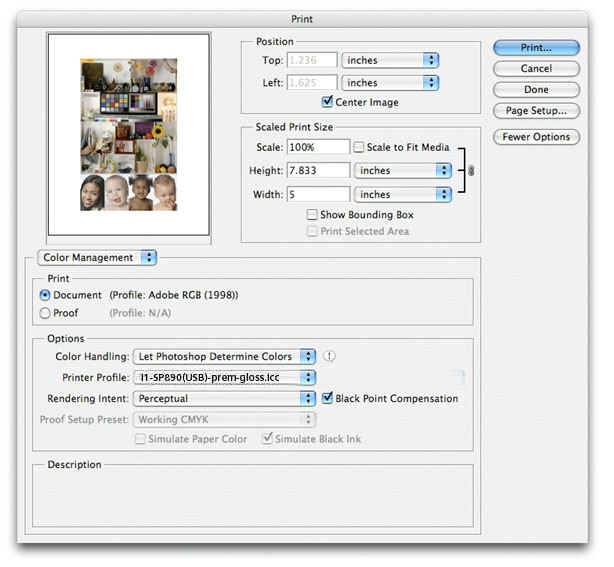
In Photoshop, choose File>Print with Preview. You will see a dialog box similar to the one below. Select Color Management in the drop-down list under the picture preview as shown. Under Color Handling, select the choice "Let Photoshop Determine Colors". Choose i1-SP890(USB)-prem-gloss.icc as the custom printer profile you wish to use with Epson Premium Glossy photo paper, select Perceptual as the rendering intent, and check the "Black Point Compensation" button.
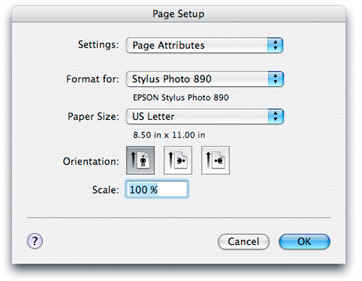
Click the Page Setup button, and be sure that "Stylus Photo 890" is showing - not "Any Printer" in the Format for field. See below. NOTE: Some implementations of the printer driver list the printer differently, such as "Epson Stylus Color 890" instead. This may change as you use different computers within the lab.
Click the OK button when done.
You will then be returned to the Photoshop Print dialog box. When you hit the "Print..." button you are presented with driver options. Because the custom printer profile (i1-890(USB)-prem-glos.icc) will be applied by Photoshop, you do not want to double-color manage by having the standard Epson profile applied too. This needs to be turned off in the following steps.
First, choose Print Settings from the drop-down list as shown below.
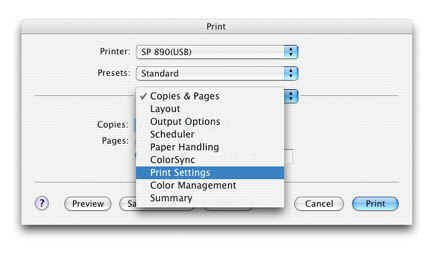
(NOTE: If Print settings doesn't appear in the list, you have a dumbed-down printer driver and can't make good prints with it. You must rechoose the printer using the Print Center and select a different driver.)
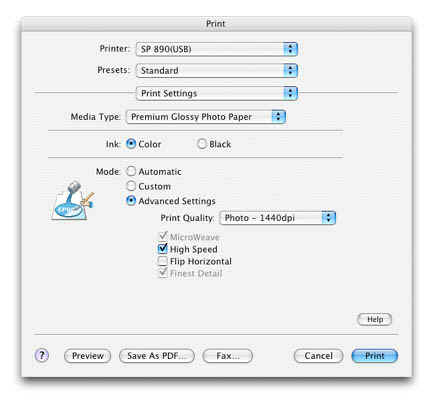
In Print Settings, choose the correct paper type (Premium Glossy Photo Paper in this case), click on Advanced Settings and choose 1440 dpi as the Print Quality to use. All settings should be as indicated below.
Next change the Print Settings to Color Management and select No Color Adjustment as shown below. This disables the built-in color management and allows the custom profile to be the one affecting print quality.

Go back to Print Settings to double-check that they remain as selected. (I've seen these reset themselves on some occasions after changing Color management selections).
Hit the Print button, and the printing should commence.