
Printing to the Epson 890 Printers with Custom Color Profiles
Valid for Photoshop version 6 under Mac OS9.x
When printing to the Epson 890 color ink-jet printers, it may be useful to use a custom-made profile to achieve better color. VisCom has custom profiles for use with several different papers. Click here for a page showing available color profiles for the VisCom printers.
The profiles available are limited, so be sure the paper you purchase is listed. The sample screens below are for the Epson 890 printers using Epson "Premium Glossy Photo Paper".
After you tone the picture to satisfaction in Photoshop, first make sure that the Epson 890 printer is plugged into the computer you are using, and then ensure that it is selected in the Mac's Chooser as shown below.
Next, go to File > Page Setup to choose either Portrait or Landscape orientation. Click OK.
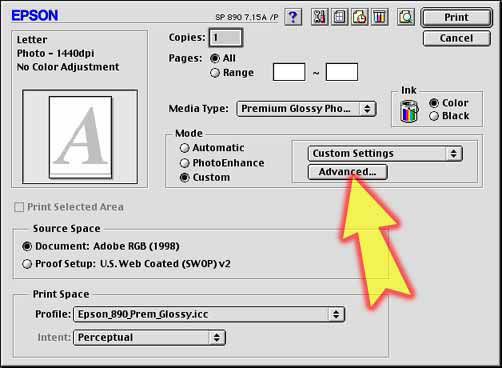
When you are ready to print, choose File > Print from within Photoshop to open the print dialog box. It should look similar to the one below, but may have some differences in settings. It is especially important to select the Print space profile that represents the paper you are using. For Premium Glossy Photo Paper, use the "Epson_890_Prem_ Glossy.icc" profile (the one with underscores between words). For photographs, the intent should remain Perceptual. Change the other settings to reflect those shown below, then press the Advanced button to continue.
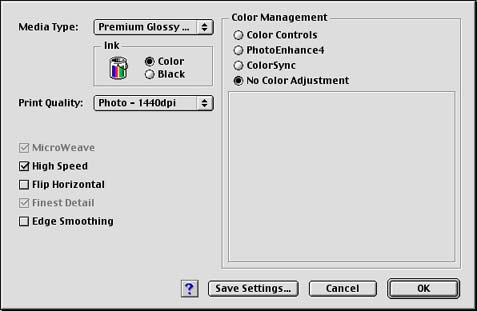
The Advanced screen (below) lists the current Epson printer driver settings. Make sure that the paper you selected shows in the Media Type list (shown as Premium Glossy in this example). Change Print Quality to 1440 dpi (the 2880 dpi setting makes printing VERY slow without showing much visible improvement). Also choose No Color Adjustment in the Color Management section - Photoshop will do the color management tasks when you print. High Speed should be checked to halve the printing time.
OK out of this dialog box (you will be returned to the first one), insert your Epson Premium Glossy paper, and hit the Print button.
NOTE: The Epson Premium series papers (i.e. Premium Glossy, Premium Semigloss) tend to have reddish shadows when they first emerge from the printer. Be sure to wait 5-10 minutes for a print to dry thoroughly before making critical color decisions.