Recently created page. Please let me know of any errors! william.schneider@ohio.edu
Activate InDesign's Color Management System
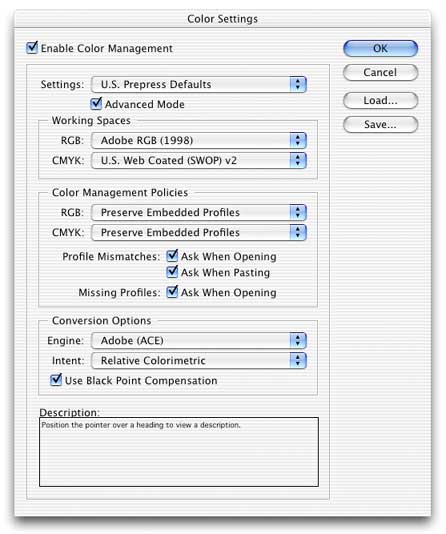
Before you begin design work in InDesign, be sure to enable color management to achieve predictable color. To do this, start InDesign, then click Edit>Color Settings. Choose U.S. Prepress Defaults in the Settings field. Once you click OK, ColorSync color management will be enabled. (Note: I am unsure how an earlier document created or saved without color management will display on-screen or how it will be color managed once these steps are followed. Proceed at your own risk)

As an option, you may choose the U.S. Sheetfed Coated v2 CMYK space if you need to create and use more vibrant colors. This choice represents a wider gamut of possible colors. Keep in mind that the colors you create are limited by the capabilities of the printer used, and sheetfed presses are slower to run than web presses that use rolls of paper. For RGB pictures placed in the document, this setting won't matter if you print to the HP Color LaserJet instead of a real CMYK printing press. The choice affects only colored text, borders, graphics, and other items created in InDesign.
Choosing Color when Creating a Document
All color judgement should be done on calibrated monitors or on the iMacs with the screen adjusted correctly. (See the Toning Pictures on LCD Screens page for tips on how to do this)
When placing new pictures in the document, you may see a dialog box informing you that the picture doesn't have a profile or the profile doesn't match the working RGB space. For RGB documents, it is safe to convert colors or to use the existing profile but do not place them without some sort of color management.
After you have created the InDesign document and wish to print it, perform the following steps:
Printing Steps and Using Custom Color Profiles
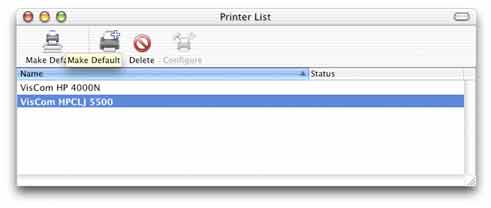
First use the Printer List in Mac OSX's Print Center utility to select the VisCom HPCLJ 5500 as the default printer.
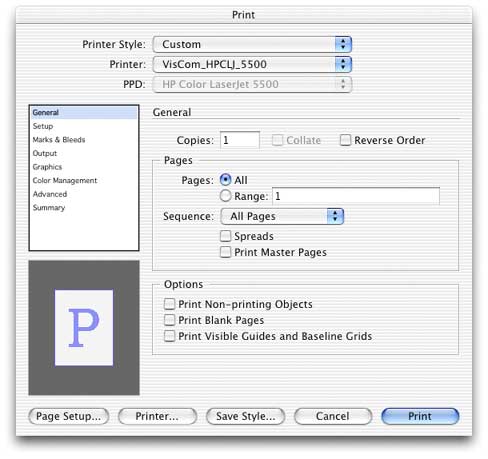
Next, choose File>Print from the InDesign menu.
Select the VisCom_HPCLJ_5500 printer from the drop down list of printers. See the screen capture below.
Page Setup:
The HP printer has only 11x17 paper. You MUST set the paper to 11x17 or it will stall the print job waiting for attention. You can lose print credits! Setting up the paper size requires choosing the Setup option in the box of options to the left of the dialog box. In this Setup dialog box (see below) set paper to 11x17 and select whether you want Portrait or Landscape paper orientation. Click OK when done.
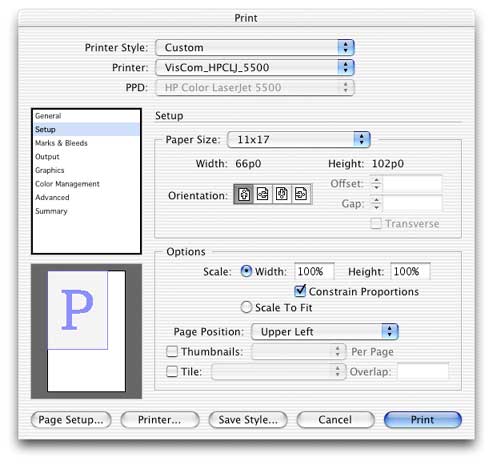
Be sure to select 11x17 paper.
Setting Color Management Options at Print Time:
Click the Color Management choice on the list at the left. Color Management options appear as shown below.
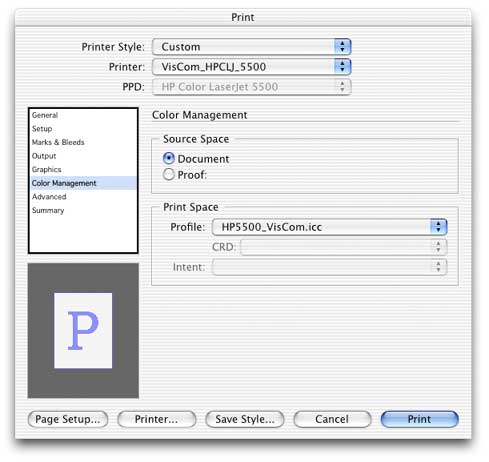
The Source Space should be set to Document.
The Print Space Profile should be set to HP5500_VisCom.icc
The Print Space Profile setting should be set to a color profile that describes the characteristics of the printer, but keep in mind that laser printers drift widely in color. Because this printer prints differently from day to day, the profile may produce somewhat off-color results. There is no solution to the problem of printer drift and color coming from this printer will be only approximate.
Setting Other Options for Printing
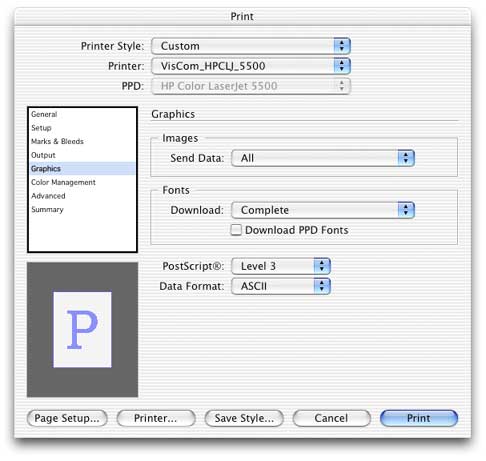
Check the Graphics option to be sure that the Send Data setting in Graphics is set to All as shown above.
If you wish to have crop marks, select the Marks and Bleeds choice in the dialog box for these features.
You're now ready to hit the print button and wait for your print.
Note: Laser printers are affected by humidity, temperature and other factors that are outside of our control. Colors will shift over time.
Back to the Color Managed Workflows for Printing to the HP 5500 from Mac OSX page to see how to print from other programs.