Setting up Photoshop's Color Settings
For best printed results from Photoshop to our printers, make sure that the document is toned in RGB color with 200 dpi minimum resolution. All toning should be done on calibrated monitors or on the iMacs with the screen adjusted correctly. (See the Toning Pictures on LCD Screens page)
Also, be sure that Photoshop's color settings (Photoshop>Color Settings) are set like that shown below:

The Advanced Mode check box may or may not be checked. When checked, the dialog box displays a few more options for Photoshop. These should NEVER be changed from those shown.
When opening pictures that have a different or missing color profile you will get a notice. Always assign the working RGB profile to the document (it should indicate "Adobe RGB (1998)" if the settings have been made correctly as shown above). Note: Using sRGB as a color working space will limit your ability to achieve brilliant blues and greens. Avoid using sRGB unless your pictures are going onto the web.
Choose the HP Color LaserJet 5500 Printer
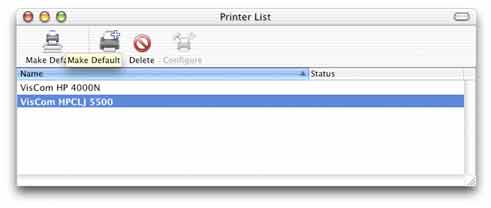
Use the Mac OSX's Print Center utility to select the VisCom HPCLJ 5500 as the default printer. If it doesn't appear in the list, see the lab manager (Marvin) and tell him to install the HP 5500 printer files on your machine.

Page Setup:
The HP printer has only 11x17 paper. You MUST set the paper to 11x17 or it will stall the print job waiting for attention. You can lose print credits! Setting up the paper size requires using Photoshop's File>Page Setup dialog box. In this dialog box (see below) set paper to 11x17 and select whether you want Portrait or Landscape paper orientation. Click OK when done.
Be sure to select 11x17 paper.
Setting Printer Driver Options:
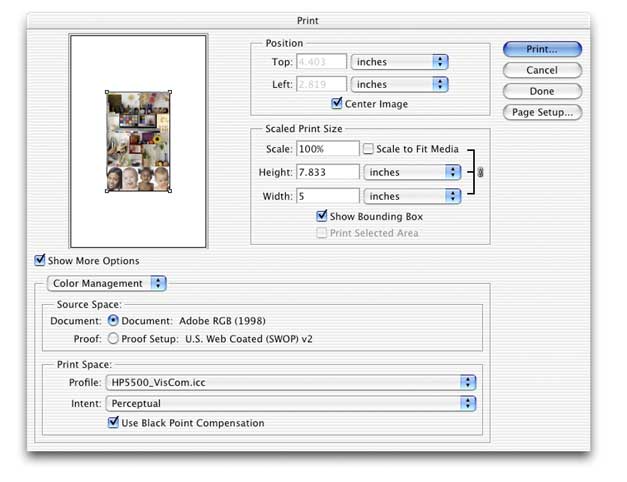
When you choose File>Print with Preview from Photoshop 6 you are presented with this dialog box. In the Color Management section, choose "HP5500_VisCom.icc" as the color profile to use. Intent should be set to Perceptual.

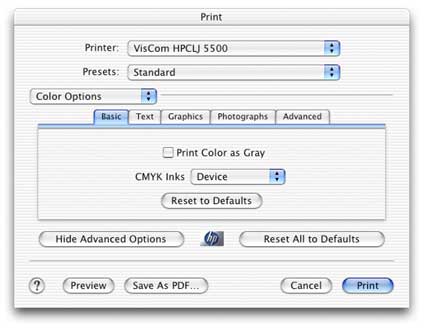
When you press the "Print..." button, you are presented with another series of dialog boxes. Where this dialog box says Copies & Pages, click the drop-down list and select Color Options, then press the Show Advanced Options button. The resulting dialog box should look like the one below. Change CMYK inks to Device.

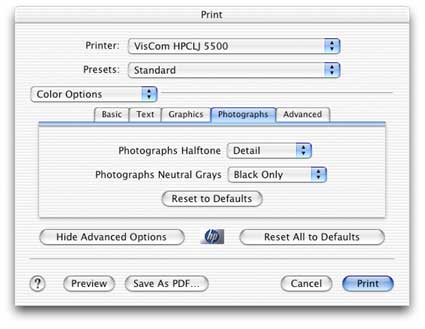
Next, click on the Photographs tab, and choose Black Only for Photographs Neutral Grays.

You're now ready to hit the print button and wait for your print.
Note: Colors may shift from day to day. Laser printers are affected by humidity, temperature and other factors that are outside of our control. Darker colors are less affected than pale colors.
Back to the "Typical Color Managed Workflow for Printing to the HP 5500 Color Laser Printer" page to see how to print from other programs.