
Removing Veneer with a Hand Plane
I had almost finished a pair of Zaph ZDT3.5 speakers when I sanded through the veneer on the back of one of them. Ouch!
I tried to match the color with artists pencils,
but because real wood grain reflects different tones when seen from different
angles, it wasn't satisfactory.
For example, this angle looks good:
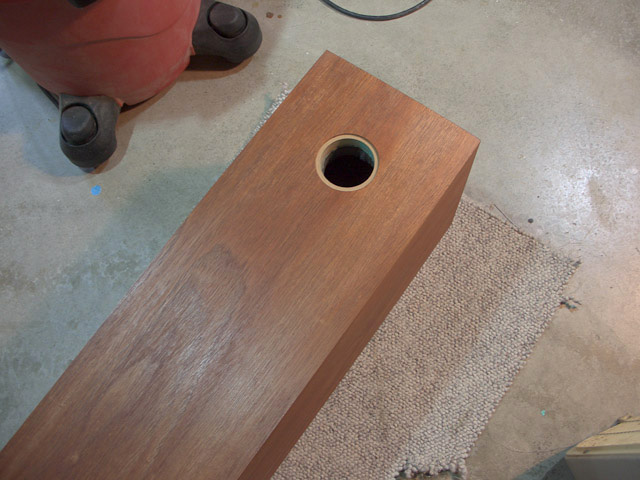
But seen from above (first picture), it was still very visible.
In disgust, I just stopped working on them for a while. I had to cool down.
First, I thought that I'd just use 80 grit sandpaper in my orbital sander to
remove the old veneer, but a better idea appeared.
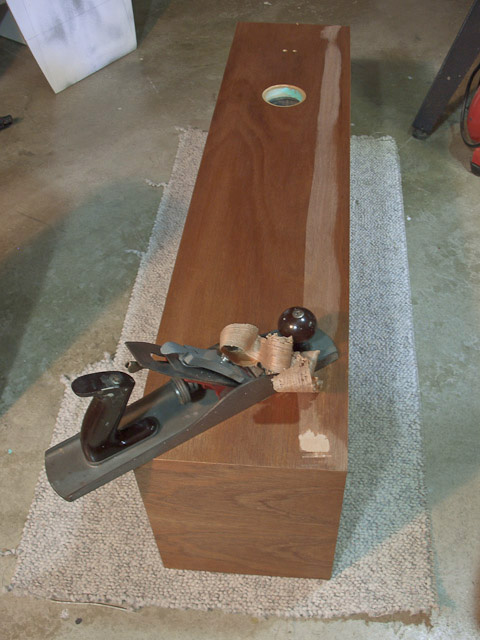
Instead of sanding, I used a pair of hand planes to slice off the veneer in thin
sheets. The jack plane did the heavy cutting, and I followed that up with the
smoothing plane. This was almost too easy!
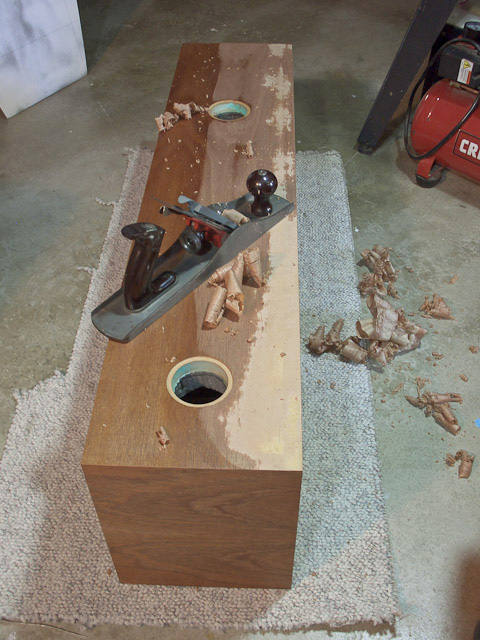
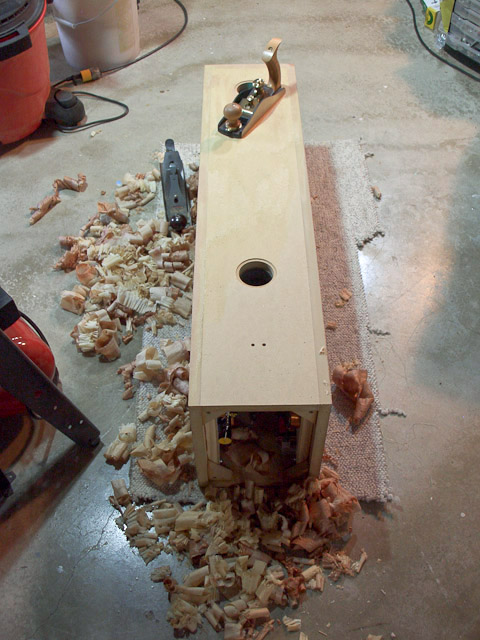
This worked very well and was very fast (15 minutes), and I'm left with very
little touch-up to do before I glue another piece of veneer to the back.
This could have been done using only a jack plane (like an old Stanley #5) for the heavier removal, followed up by smoothing with sandpaper. Used Stanley #5 jacks show up on the WoodNet forum from time to time for around $50, and sometimes other makes like Craftsman are even cheaper. However, the smooth plane shown in the last photo above was fairly expensive, but it is not necessary.
Keep in mind the blade of the plane must be razor
sharp to do this well. Hand planes sharpening can be done using various grits of
sandpaper adhered to a piece of glass (search the internet for the "scary sharp"
method), or with water stones. If you haven't used hand planes before, do a
little research before starting. Practice on scrap wood first.
I thought that I'd pass this along in case someone needs a quick, easy way to
remove veneer.
Let's hope you don't though!
[back to the veneering main page]